This London 7 Days Itinerary is not built to “see everything.” It’s built to stop your week from collapsing into daily repairs.
If you’re planning a one week in London itinerary, the real goal is not more landmarks—it’s fewer failure points.
You don’t feel excited the moment you book London for a full week. You feel responsible. Because a 7-day trip creates a dangerous kind of confidence: you start believing you can be sloppy and still “have time.”
That’s how people lose London.
They land tired. They drag a suitcase through a station with three exits and one sign that makes sense. They open Maps and the city suddenly feels bigger than it should. Then the week starts, and the quiet problems pile up: the wrong Tube exit, the “near station” hotel that is a 16-minute walk, the queue that steals your best daylight hour, the rain that compresses everyone indoors, the lazy decision to “just add one more stop.”
Seven days doesn’t fail loudly. It fails slowly.
| At a glance | What this 7-day plan is built for |
|---|---|
| Pace | Balanced week (icon days + neighborhood days + one recovery buffer) |
| Daily walking | Medium–High (kept survivable with tight zones + daily buffers) |
| Prebook priority | 1–2 queue-heavy anchors only (protect timing, don’t overbook your week) |
| Best base | Zone 1–2 (or strong Zone 2) with short station walk + direct/one-change routes |
| Biggest risk | Cross-city hopping (it steals hours across 7 days) |
Quick navigation: Day 1 | Day 2 | Day 3 | Day 4 | Day 5 | Day 6 | Day 7 | FAQ

A week in London doesn’t need more “places.” It needs a structure that survives fatigue, queues, and wrong turns.
London 7 Days Itinerary (2026): The Shock Truth (And The Fix)
A short London trip forces discipline. A long London trip invites carelessness.
With 2–3 days, you feel pressure, so you cluster your areas. With 7 days, people start scattering: “We’ll do Westminster, then pop to Notting Hill, then maybe the Tower later.” They book a hotel that looks cheaper, then pay for it in daily commuting. They keep adding timed tickets until the week has no flexibility left.
And London punishes one thing more than anything else: vague plans.
If you want the big, city-level logic behind that (how London quietly punishes vague planning), read this first and come back:
Complete Travel Guide to London 2026: The City That Punishes Vague Plans
The Reality (No Romantic Version)
London is one of the best first-visit cities in the world. It’s also a city where tourists waste time in the same predictable ways—especially on week-long trips.
1) Distances are deceptive. Neighborhood names sound close. They are not always close. A “quick hop” can become a chain of escalators, platforms, and exits when you’re tired.
2) Queues don’t just cost time—they destroy rhythm. The real damage is not the ticket price. It’s the way a long queue forces you to rush everything afterward.
3) Weather changes the physics of the city. Rain doesn’t simply make you wet. It pushes crowds into the same indoor spaces at the same time, and waiting expands everywhere.
4) Your base controls your entire week. On a 7-day trip, your hotel is not “where you sleep.” It’s your control center. If your base is awkward, every day starts with a small tax—and seven days turns that tax into hours.
The Real Travel Decision: Who This Plan Is For
This itinerary is for you if you want a ready-to-run week: icons, neighborhoods, museums, markets, parks, and one flexible day that protects your energy.
This plan is not for you if your goal is to chase every famous thing in London and bolt on day trips like collectibles. London will let you try. It will also leave you exhausted, slightly confused, and remembering more transport than the city.
TripsCity rule: if your week requires constant “we’ll figure it out,” it’s not a plan. It’s a risk.
Real Numbers That Matter for a 7-Day London Week (So Your Plan Stays Honest)
London budgets don’t break because you bought one expensive ticket. They break because you leak money through friction: extra rides from bad sequencing, convenience spending because your day is too tight, and daily mistakes that force “repair moves.”
Use these planning anchors:
| Category | Weekly planning anchor (per person) | What usually breaks it |
|---|---|---|
| Transport (central sightseeing days) | Think in daily cap terms, not single rides | Staying far out, bouncing zones, splitting payment methods, missing touch-out |
| Food | Varies massively by style—plan for flexibility | Overpacked days = convenience purchases + rushed choices |
| Attractions | 0–2 paid “big anchors” is the smart week | Buying tickets to “fix” a day you lost to queues |
If you want the deep money logic (what you really spend per day in 2026 and why tourists miscalculate), these are your funnels:
London Budget Guide 2026: What You REALLY Spend Per Day (Real Numbers)
Is London Expensive for Tourists in 2026? The Honest Cost Reality
And if you want the transport cost system explained properly (caps, passes, and the mistakes that inflate your week), use:
London Public Transport Costs Explained (2026): Daily Caps, Passes & The Mistakes That Cost You
Official fare capping rules and cap prices are here (always check before you travel):
Transport for London (TfL): Fare capping
Built for Different Traveler Types (So the Week Fits Your Reality)
Couples
Couples don’t ruin 7 days by “missing attractions.” They ruin it by turning the week into a photo chase across multiple zones. The fix is fewer cross-city hops, more neighborhood texture, and one daily buffer that protects mood. If you lose mood, London stops feeling special and starts feeling technical.
Families
Families don’t need more stops. They need fewer surprises: short station walks, fewer line changes, earlier starts, and lighter afternoons. If the week has no recovery blocks, Day 3 becomes the collapse point and the rest of the trip becomes negotiation.
Budget travelers
Budget travel in London is not “cheap hotel.” It’s a cheap base—a location that keeps your transport simple and reduces daily mistakes. The week is won by capping and clustering, not by sleeping far out and commuting daily.
Comfort travelers
Comfort isn’t luxury. Comfort is a week that doesn’t require constant fixing: a base with a short station walk, clean connections, and a plan that protects sleep so Day 5 still feels human.
If you haven’t booked accommodation yet, stop and do base logic properly—because it decides your entire week:
Where to Stay in London (2026): The Base That Makes London Feel Easy
Best Areas to Stay in London for First-Time Visitors (2026): Calm, Connected, Not Complicated
If you want a practical way to compare areas and hotels (so you don’t accidentally buy a commuting tax), use a station-based search and keep your base inside your weekly logic:
Compare London hotels by neighborhood and station access
Deadly Mistakes That Break a 7-Day London Plan
Mistake #1: Choosing a “cheaper” base that turns into commuting.
Seven days means you commute at least 14 times (out + back). Add 20 minutes each way and you just donated hours of your week to transport.
Mistake #2: Planning London like it’s one straight line.
London is layers: station exits, river crossings, platforms, queues, weather. A plan without buffers is not a plan.
Mistake #3: Stacking the biggest icons back-to-back early.
People try to “finish the icons” by Day 2. Then they crash. A good 7-day itinerary spreads intensity and protects legs.
Mistake #4: Trusting “near the station.”
The most expensive lie in London is the phrase “5 minutes from the Tube.” If it’s 14 minutes with luggage, it’s not “near.”
Mistake #5: No rain plan.
Rain doesn’t just change your activity. It changes crowd behavior. You need swaps ready before you wake up.
The TripsCity Structure: How This London 7 Days Itinerary Is Built
This 7 day London itinerary is built on three mechanics:
1) Clusters: each day lives in one main zone so London stays coherent.
2) Anchors: each day has one “must-do” anchor and one controlled secondary choice.
3) Buffers: every day has a repair block for queues, fatigue, and mistakes—so the plan survives reality.
If you want the transport system simplified (Tube, buses, Oyster/contactless) so you stop leaking time daily, read:
How to Get Around London (2026): The System That Saves Your Day (Tube, Buses, Oyster & Contactless)
London in One Glance: The 7-Day Map (So You Don’t Scatter)
| Day | Core area | Day anchor | Secondary anchor | Buffer purpose |
|---|---|---|---|---|
| Day 1 | Westminster + South Bank | London’s “core spine” | One viewpoint OR one interior | Absorb queues + keep Day 1 coherent |
| Day 2 | Royal London + West End edge | Parks + royal spine | One classic street loop | Prevent over-stacking after Day 1 |
| Day 3 | South Kensington | One museum anchor | One calm neighborhood reset | Energy recovery (protect the week) |
| Day 4 | City of London + Tower side | Old London walk | One ticketed choice (optional) | Control walking + queue risk |
| Day 5 | Markets + canals OR a park-led day | One “texture day” | One light add-on | Stop the week becoming repetitive |
| Day 6 | Flexible day (your pace) | Weather-proof block | Short “bonus” only if week stayed clean | Repair day for reality |
| Day 7 | Clean ending day | One tight loop | Airport/packing logic | End calm (no panic commuting) |
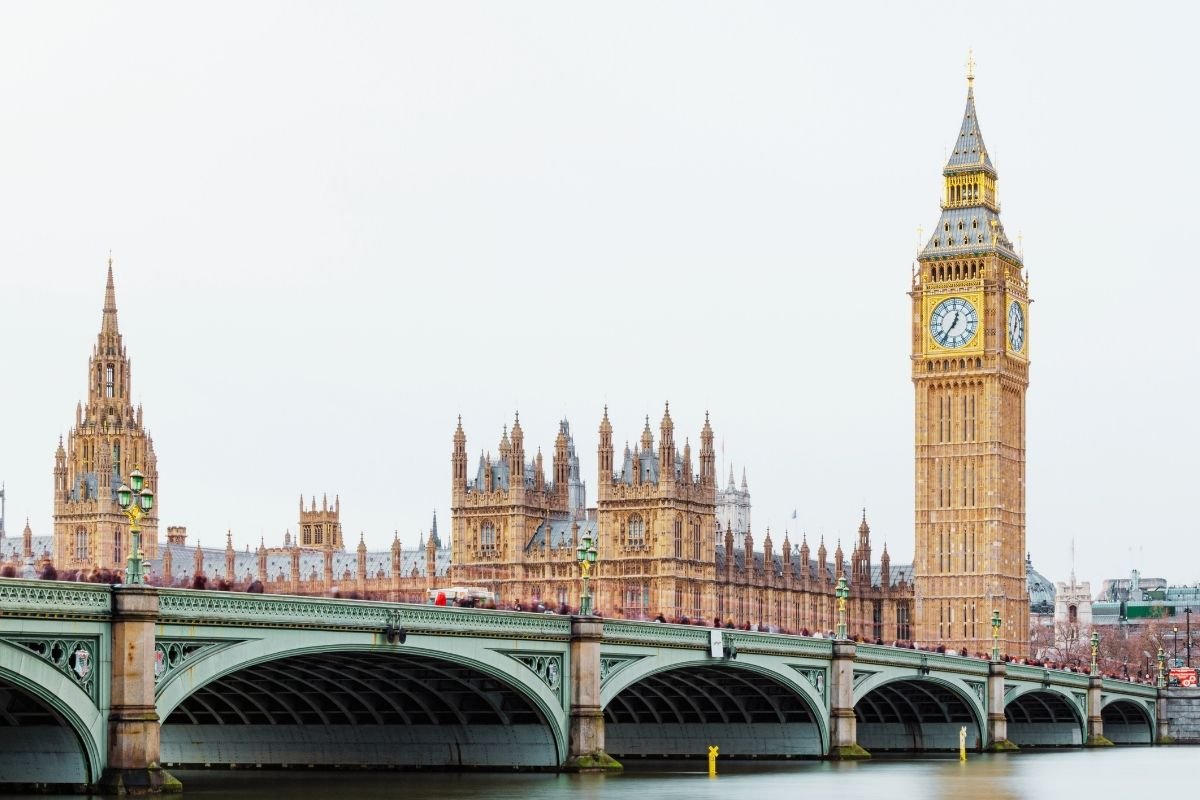
Day 1: Westminster + South Bank (With Real Timing)
Day 1 goal: get your first big London win with a route that feels obvious. This day is built around one walkable spine so you don’t waste your best energy underground.
Closest stations: Westminster, Waterloo.
Station-walk rule: if your hotel is a 12–15 minute walk from the station, you will feel it twice a day for a week.
08:30 – 09:30 | Start early at Westminster
This is where tourists either win or lose the day. Early hours are calmer, photo-friendly, and emotionally easier. You want London to feel big—not crowded.
09:30 – 12:30 | Walk the South Bank sequence (the coherence engine)
Day 1 works because it is walk-first. You keep your brain clean and your map simple. The South Bank is one of the best first-day designs in London because it reduces line changes and decision fatigue.
12:30 – 13:30 | Lunch near your next stop (no transport detour)
London punishes lunch detours. Keep it close. Keep it simple. You’re not “missing out” by eating efficiently—you’re protecting the afternoon.
13:30 – 16:00 | One strong afternoon anchor (choose ONE)
Option A (Viewpoint — choose ONE):
Sky Garden (best “free” high view if you can get a slot) OR The Shard (premium skyline view, best when you want one “big” moment) OR London Eye (classic, but protect timing and queues).
Option B (History interior — choose ONE):
Westminster Abbey (deep first-timer interior) OR Churchill War Rooms (strong “memory” stop, indoor, controlled) OR St Paul’s Cathedral (iconic interior with big payoff if you keep it as one committed block).
Option C (Indoor culture — choose ONE):
Tate Modern (easy add-on with river rhythm) OR National Gallery (central classic, best if you want controlled indoor time) OR British Museum (huge—only if you commit to a tight “2-hour focus,” not wandering).
Reality anchor: this is not “which is best.” It’s which one fits your energy and your queue tolerance. Pick one, then protect the buffer.
16:00 – 18:30 | Buffer block (the repair shield)
This block exists so the itinerary survives reality. If queues were longer than expected, you absorb it here. If you’re tired, you end early without guilt. If the day ran perfectly, you add one calm extra loop.
Day 1 cut rule: cut the extra stop, not the spine. London is not a city where “adding one more thing” is free.
Day 2: Royal London + Classic Streets (Where People Start Over-Stacking)
Day 1 gives you the first win. Day 2 arrives with a dangerous feeling: confidence. That’s when people start adding extra stops “because we still have time.” Seven days makes that temptation worse.
Closest stations: St James’s Park, Green Park.
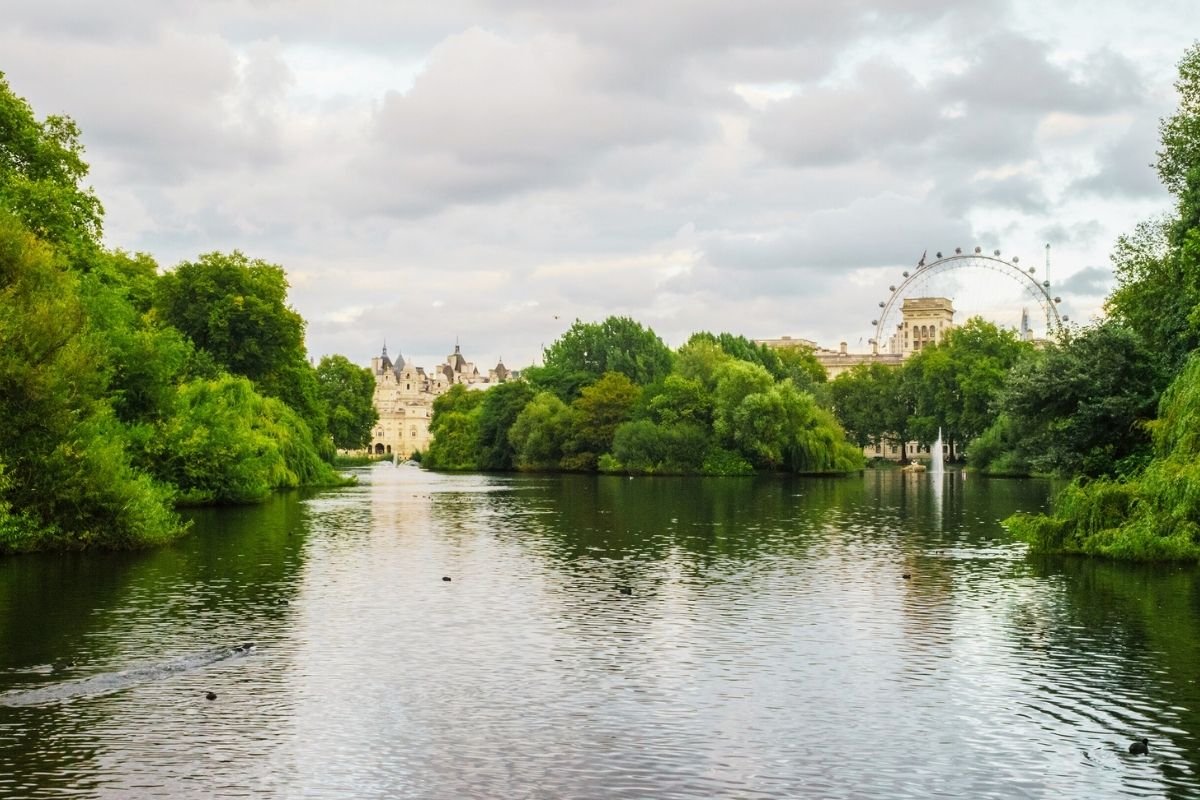
08:45 – 09:30 | Start with a park (the mood stabilizer)
Parks are not “extra” in London. They are a stability tool. A calm start makes the rest of the day feel controlled—especially for families and couples.
09:30 – 11:30 | Royal spine block (do the outside logic first)
Most first-timers over-commit to interiors early. TripsCity rule: start with the outside sequence first, then decide if an interior is worth the queue and time slot. If the line looks like it will eat your best daylight hours, you pivot. Your itinerary is a system, not a dare.
11:30 – 12:30 | Walkable transition (don’t Tube for one stop)
A classic London time leak: taking the Tube for a one-stop move. Stairs, platforms, exits—suddenly “one stop” costs 18 minutes. If your next block is walkable, protect the rhythm and stay above ground.
12:30 – 13:30 | Lunch reset (this is how the week stays strong)
On a 7-day trip, lunch isn’t just food. It’s recovery. If you rush lunch daily, the whole week becomes brittle.
If you want one “fixed time, fixed location” food experience that avoids the crowded guessing game, a local home-hosted meal can work well on a long trip—because it gives you a calm, structured break:
Check a local-hosted home dining option in London
13:30 – 16:30 | Classic streets loop (choose ONE named loop)
Option A (Classic): a Covent Garden loop. Keep it tight. End while it still feels clean.
Option B (High-energy daylight): a Soho + Chinatown loop with a strict radius. Don’t drift.
Option C (Shopping corridor, controlled): a short Regent Street / Carnaby-style loop. Stop before it becomes “just one more street.”
The right way is one loop that feels iconic, then a calm finish. The wrong way is stitching three loops together because everything sounded close.
16:30 – 18:30 | Buffer block (where you protect the whole week)
This is where you win a 7-day trip. If you ran late, you end calm instead of rushing the finish. If the day stayed on time, you add one gentle extra—something that does not require complex transport or queues.
If you want an easy orientation tool (especially good early in the week), a hop-on/hop-off ride can help—only if you use it as a short perspective block, not as your entire day:
Check Big Bus options (use as orientation, not a full-day crutch)
And if you’re landing without reliable data, fix it before Day 1–2 becomes a navigation tax:
Day 2 works when you start calm. A park-led morning prevents the classic London mistake: over-stacking too early in the week.
Day 3: South Kensington Museums + One Calm Reset (So the Week Doesn’t Snap)
Day 3 is where first-time London weeks usually break—not because London is “hard,” but because your body finally starts charging you for everything you did on Day 1 and Day 2.
The mistake is predictable: tourists treat museums like a “quick stop,” then accidentally spend hours standing, walking, and absorbing noise… and still try to do a full neighborhood day afterward. That’s how a 7-day trip turns into a tired 4-day trip with three recovery days you didn’t plan.
TripsCity rule: Day 3 is a controlled recovery day. You still get major value, but you protect energy so Day 4 and Day 5 stay enjoyable.
Closest stations: South Kensington, Gloucester Road.
Base friction check: if your “near station” stay takes 12–15 minutes door-to-platform, you’ll pay that tax daily—especially once fatigue hits.
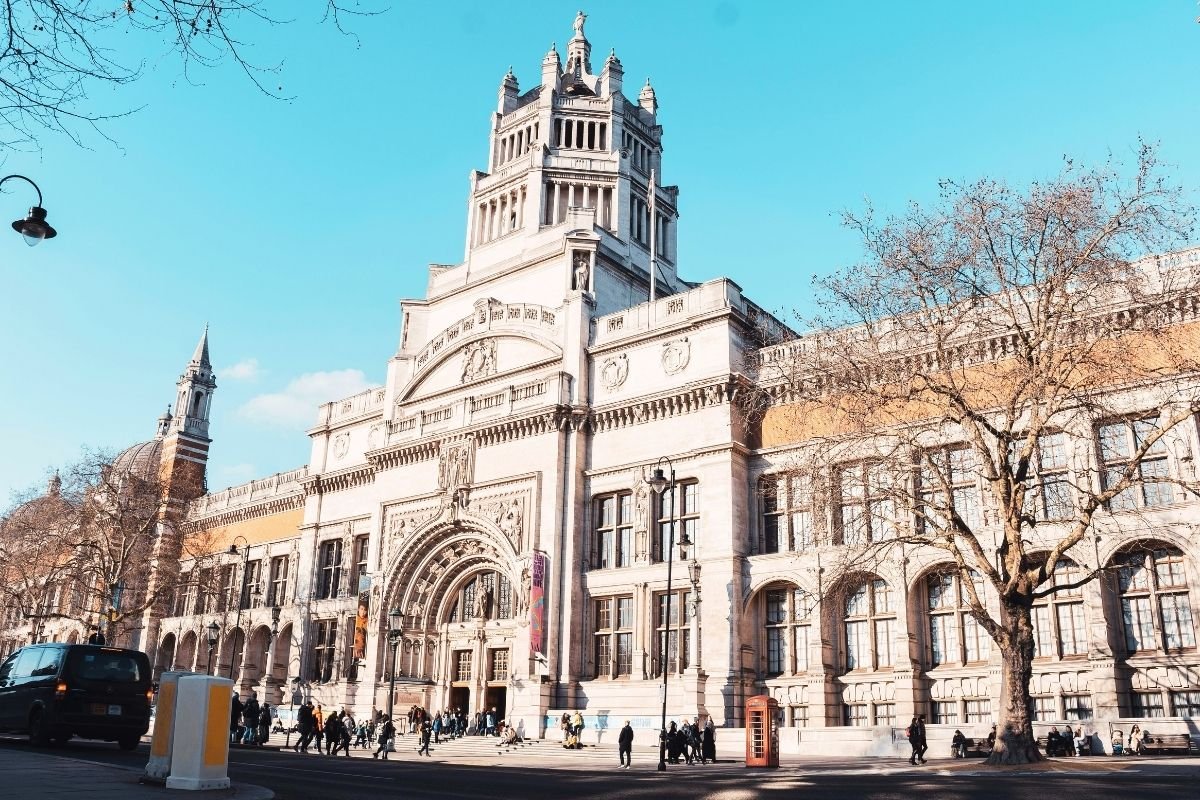
09:30 – 12:30 | Museum anchor (choose ONE, not three)
You’re choosing an anchor, not “a museum day.” One anchor is what keeps the afternoon clean.
| Choose ONE | Best for | Watch for |
|---|---|---|
| Natural History Museum | First-timers who want a “wow” museum without needing deep art focus | It can get crowded; go earlier and keep your plan disciplined |
| Victoria and Albert Museum (V&A) | Design, culture, variety, calmer pacing | It’s easy to wander too long—pick 2–3 sections and stop |
| Science Museum | Families, interactive energy, lighter momentum | Don’t try to “see it all”—choose a floor/section focus |
The discipline rule: choose the anchor, then decide on a small bonus (one extra wing, one short adjacent stop) only if your energy is strong. Museum fatigue is real—and it steals your patience for everything later.
If you want the transport system simplified (so you don’t turn Day 3 into transfers and exits), this guide keeps movement clean:
How to Get Around London (2026): The System That Saves Your Day (Tube, Buses, Oyster & Contactless)
12:30 – 13:30 | Lunch + reset (non-negotiable)
On a 7-day plan, lunch is not “a quick bite.” It’s a reset. If you rush lunch on Day 3, you pay for it in the afternoon with sloppy movement and zero tolerance for crowds.
13:30 – 16:30 | One calm reset loop (choose ONE, keep radius tight)
Option A (Green reset — choose ONE route):
Hyde Park (Serpentine edge) OR Kensington Gardens (Italian Gardens) OR Regent’s Park (if you want a cleaner “open-space reset” and you’re okay with one simple move).
Option B (Neighborhood texture, controlled — choose ONE):
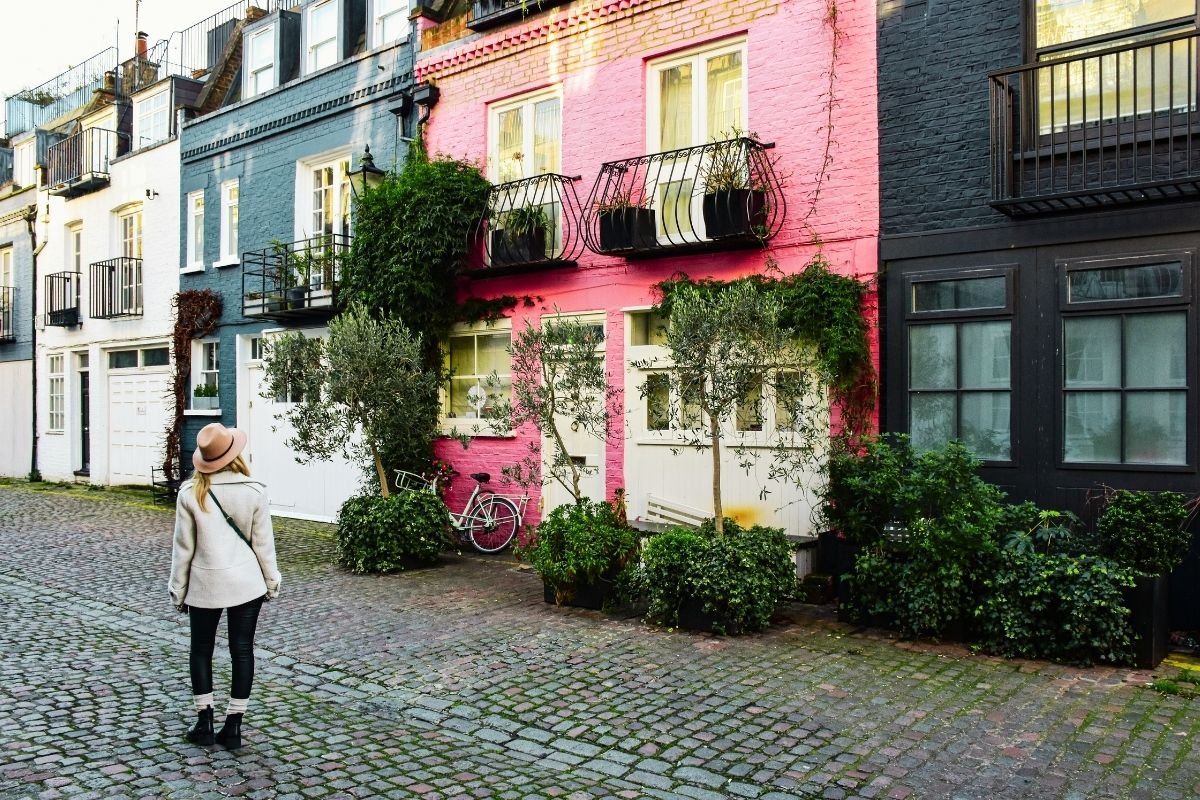
Knightsbridge short loop (Harrods exterior + calm streets) OR South Ken to Chelsea edge (one tight walk, no cross-city jumps) OR Notting Hill micro-loop (only if you keep it short and don’t turn it into a wandering day).
Option C (Rain-safe — choose ONE):
Extend your museum block + V&A / Science bonus wing OR nearby indoor add-on + a short covered walk OR early finish (yes—this is a real strategy on a full week).
16:30 – 18:30 | Gentle finish (protect Day 4)
Day 4 is heavier (older London, longer walking, ticket temptation). So ending Day 3 before you crash is not “wasting time.” It’s protecting the week.
Day 3 cut rule: if you’re tired, cut the bonus wing. Keep the day simple. Your recovery matters more than “one more room.”
Day 3 is the recovery engine. Pick one museum anchor, then keep the afternoon radius small so the week stays strong.
Day 4: City of London + Tower Side (Built as One Story, Not a “Maybe List”)
By Day 4, London starts charging you differently—not in money, but in attention.
You’re familiar enough to move faster, and tired enough to make expensive mistakes: trusting “close enough,” skipping the station-walk check, entering a queue at peak time, and then trying to repair the day with rushed movement.
So Day 4 is built as one story: Old London in the morning, then a controlled Tower-side block in the afternoon.
Closest stations: St Paul’s, Tower Hill.
Reality note: the City is dense and layered. “One more stop” here is rarely free.
08:45 – 10:45 | City walk block (Old London first, while your brain is fresh)
Start early. The City feels cleaner before the crowd density rises. This block should be walk-first because the highlights are close—but the exits and transfers can waste time if you bounce underground for no reason.
Pick 2–3 highlights max (not all). This is where tourists lose the morning by drifting.
10:45 – 12:15 | One “inside” stop (choose ONE)
Option A (Major interior): St Paul’s Cathedral (commit to a real block; big payoff, big time).
Option B (Shorter interior): Guildhall Art Gallery (lighter, calmer) OR Bank of England Museum (small, controlled, low friction).
Option C (Skip interiors): keep it outside and protect your Tower-side timing (this is the cleanest choice when queues look ugly).
Queue rule: if the line will steal your best midday window, don’t “push through.” Pivot. Your itinerary is built to survive reality.
12:15 – 13:15 | Lunch reset (near the transition, not across the map)
Day 4 collapses when lunch becomes a detour. Eat close, reset, then move with purpose. The goal is protecting the afternoon.
13:15 – 16:30 | Tower-side block (choose your intensity level)
This is your highest queue-risk section of the week. Be disciplined.
Option A (Full experience): Tower of London (commit to a real block).
If you want to protect timing and avoid the “should we / shouldn’t we” spiral, you can check ticket options here:
Tower of London ticket options.
Option B (Shorter, still iconic): Tower Bridge Exhibition (lighter than the Tower, still a “real” interior stop) OR a shorter paid stop that doesn’t eat your whole afternoon.
Option C (Outside-only): Tower Bridge area + controlled riverside walk (best when legs are tired and you value coherence more than content).
Official planning (check current ticket/prices and entry rules):
Historic Royal Palaces: Tower of London tickets & prices
16:30 – 18:30 | Riverside finish (the coherence closer)
Close the day with one clean ending that doesn’t require complicated transport. Day 4 is not the day to bolt on extra neighborhoods.
Day 4 cut rule: if you’re behind schedule, cut the extra loop—not your buffer. Buffers are how the week stays calm.
Also: by Day 4, tired tourists become less alert in crowded hubs. If you want the clean safety rules (common scams + night movement rules), keep this saved for the trip:
London Safety Guide 2026: Safe Areas, Common Scams & Night Travel Rules

Day 4 works when you treat the Tower side as one controlled block—not a list of maybes stitched together with stress.
Day 5: The “Texture Day” (Markets + Canals + One Viewpoint, Without Chaos)
Day 5 is where a week-long trip can start feeling repetitive—unless you deliberately change the texture.
This is the day you stop chasing “icons” and let London feel like neighborhoods: markets, canals, parks, and small discoveries. But it still needs structure, because markets can turn into wandering, and wandering is how you lose half a day.
Day 5 rule: one main area, one rhythm, one clean finish.
09:30 – 12:30 | Choose ONE track (don’t combine tracks)
Track A (North London — Camden + Canal + Viewpoint):
Closest stations: Camden Town, Chalk Farm.
Stops (2–3, by name): Camden Market → Regent’s Canal towpath (short stretch) → Primrose Hill (clean viewpoint finish).
Cut rule: if Camden gets too crowded, cut the “extra market lanes” and protect the canal + viewpoint—don’t drift.
Rain swap: if rain hits, shorten the canal segment and pivot to an indoor cultural block later (Day 5 is not the day to improvise in weather).
Track B (East London texture — Spitalfields + Brick Lane + Shoreditch):
Closest stations: Liverpool Street, Shoreditch High Street.
Stops (2–3, by name): Old Spitalfields Market → Brick Lane → Shoreditch street-art lanes (tight radius).
Cut rule: if you feel the loop turning into “just one more street,” end it. Texture days die from wandering.
Rain swap: keep markets as the core and add one indoor stop later (don’t try to “walk through rain” for texture).
Track C (Rain-proof — Covered London, still feels like London):
Closest stations: Bank/Monument, Cannon Street (depending on your entry point).
Stops (2–3, by name): Leadenhall Market (covered) → Sky Garden (viewpoint, slot-based) → Tate Modern (controlled indoor culture).
Cut rule: if Sky Garden slots don’t work, don’t “repair it with distance.” Replace it with a tighter indoor block in the same area.
Rain swap: this track already is the swap—commit early and stop second-guessing.
12:30 – 13:30 | Lunch + reset (this prevents afternoon drift)
The hidden problem with market days is decision fatigue. You keep choosing, comparing, and re-choosing. Lunch is where you reset your brain so you don’t drift into a scattered afternoon.
13:30 – 16:30 | One controlled afternoon add-on (choose ONE)
Option A (Green finish — choose ONE):
Closest stations: Baker Street / Regent’s Park (for Regent’s Park), Hyde Park Corner (for Hyde Park), Hampstead (for Heath access).
Stops (2–3, by name): Regent’s Park (tight loop) OR Hyde Park (Serpentine edge) OR Hampstead Heath (short, only if you keep it disciplined).
Cut rule: if you’re already “walk-heavy,” choose the shortest green loop—don’t turn green space into another marathon.
Rain swap: if rain starts mid-block, cut the park and pivot to a short indoor stop near your current area.
Option B (Short culture stop — choose ONE):
Closest stations: Southwark (Tate Modern), Leicester Square/Charing Cross (National Gallery area), High Street Kensington (Design Museum area).
Stops (2–3, by name): Tate Modern (tight highlights) OR National Gallery (controlled visit) OR Design Museum (compact and clean).
Cut rule: pick a “time cap” before you enter (90–120 minutes). Culture stops become day killers when you drift.
Rain swap: this is the rain-proof add-on—use it when weather makes outdoors messy.
Option C (Orientation tool, only if needed):
Closest stations: Westminster / Embankment / Tower Hill (depending on route).
Stops (2–3, by name): a short perspective ride block (bus or river-style perspective) → get off → walk one tight nearby loop.
Cut rule: if you feel yourself “staying on just to rest,” that’s your signal to stop and end the day clean.
Rain swap: if rain is heavy, keep the orientation block short and end early—protect Day 6.
16:30 – 18:30 | Buffer block (where Day 5 becomes “good” instead of “messy”)
This is where you absorb slow queues, crowded moments, and wrong turns—without letting them infect the rest of the day.
Day 5 cut rule: if the day starts drifting, tighten the radius. End calm. A good 7-day trip is won by discipline, not by squeezing.
Day 6: The Flex Day (The Day That Saves Your London 7 Days Itinerary)
Most people treat Day 6 like a “bonus day.” That’s the wrong mindset.
Day 6 is the repair day—the day that absorbs whatever London did to you during the week: the queue that stole a morning, the rain that compressed your plan, the day you walked more than expected, the museum day that ran long, the unexpected fatigue that makes “just one more stop” feel impossible.
This is why TripsCity plans always include a flex day. Not because we ran out of ideas. Because a 7-day itinerary without a repair day becomes fragile. And fragile weeks break.
Day 6 rule: choose ONE track and commit. Don’t mix tracks.
09:30 – 12:30 | Choose ONE Day 6 track (built for real life)
Track A (Weather-proof London — indoor icons, tight radius):
Closest stations: Tottenham Court Road, Holborn (depending on entry).
Stops (2–3, by name): British Museum (tight “focus visit”) → National Gallery (controlled) OR Tate Modern (choose one, not all).
Cut rule: when one indoor stop hits your time cap, you stop. Don’t “repair” time by adding a third museum.
Rain swap: this track is the rain swap—commit to it and keep movement simple.
Track B (Neighborhood depth — feel London, no cross-city jumps):
Closest stations: Notting Hill Gate / Holland Park (for West texture) OR Hampstead (for Heath texture).
Stops (2–3, by name): Notting Hill (tight loop) → Portobello Road area (controlled) → Holland Park edge (calm finish) OR Hampstead Village → Hampstead Heath (short loop) → clean exit.
Cut rule: if it starts turning into “let’s also go to…” you stop. Depth days die from extra hops.
Rain swap: if weather turns, swap the outdoor part for a nearby indoor stop and end early—don’t force the neighborhood walk.
Track C (One day trip, only if disciplined — choose ONE destination):
Closest stations (London departure hubs): Paddington / Waterloo / King’s Cross (depends on destination).
Choose ONE destination (by name): Windsor OR Oxford OR Bath (one destination, one schedule, one clean return).
Cut rule: don’t “add a second place.” The moment you combine destinations, your return becomes stress.
Rain swap: if weather looks ugly and you’re not fully committed, stay in London and use Track A. Repair days are not for stubbornness.
If you want a structured, single-destination day trip (so you’re not improvising transport while tired), you can check clean options here:
London day trip options (one destination, one schedule)
12:30 – 13:30 | Lunch reset (the hidden win of Day 6)
On Day 6, lunch is where you decide how Day 7 will feel.
If you push hard and rush lunch, Day 7 becomes the “dragging yourself” day. If you reset properly, Day 7 becomes the clean ending day that makes the entire week feel complete.
13:30 – 16:30 | One controlled afternoon anchor (choose ONE)
Option A (Short and meaningful — choose ONE):
Churchill War Rooms OR Westminster Abbey OR St Paul’s Cathedral (pick one and commit; don’t stack).
Cut rule: if queues look like they’ll eat your buffer, you pivot to a lower-friction stop—don’t burn Day 6 trying to “win a line.”
Rain swap: this option works well in rain—use it when outdoors feels like punishment.
Option B (Green reset — choose ONE):
Hyde Park OR Regent’s Park OR St James’s Park (short loop, calm exit).
Cut rule: keep it short—this is recovery, not “one more big day.”
Rain swap: if rain hits, cut the park and finish with an indoor block near your current station.
Option C (Fix what you missed):
Pick the cleanest “make-up” anchor from earlier in the week—but keep it in the same zone as your Day 6 track.
Cut rule: you fix missed content by tightening radius, not by adding distance.
Rain swap: if weather turns, fix an indoor miss (not an outdoor one).
Day 6 cut rule: do not repair the week by adding distance. Repair it by tightening your radius and choosing quality.
Day 6 isn’t a “bonus.” It’s the repair day that keeps a 7-day London plan from collapsing into tired improvisation.
Day 7: The Clean Ending Day (Where Tourists Either Finish Proud… or Panic)
Day 7 is not for ambition. Day 7 is for closure.
This is where most tourists make one final mistake: they treat the last day like an extra full day, then get punished by luggage, check-out timing, station stairs, and the mental tax of watching the clock.
TripsCity Day 7 mindset: one tight loop, one clean finish, and enough buffer to leave London without panic.
If you’re asking what to do in London in 7 days, the last-day answer is not “more.” It’s “clean.”
08:30 – 10:00 | Start with the “friction audit” (what today can realistically handle)
Before you choose anything, answer these honestly:
1) Do you have luggage with you? If yes, your movement is slower, stairs matter, and you will avoid certain routes without realizing it.
2) What’s your flight/train timing? If you have a fixed departure, your day must be built around it.
3) How tired are you, really? Day 7 is not the day to pretend you have Day 1 energy.
If you need to keep your Day 7 clean after check-out, luggage storage can remove a huge amount of friction (especially if you want a final loop without dragging bags):
Luggage storage options in London (use to protect your last day)
10:00 – 13:00 | One tight “final loop” (choose ONE, stay disciplined)
Loop A (Central closure — postcard without queues):
Closest stations: Westminster, St James’s Park, Green Park.
Stops (2–3, by name): Big Ben exterior → Westminster Bridge (short) → St James’s Park edge (calm finish).
Cut rule: if crowds spike, cut the bridge photos and keep the park finish. Closure beats content today.
Rain swap: swap the park for a compact indoor stop nearby (don’t cross the city).
Loop B (Neighborhood closure — calm + human London):
Closest stations: Marylebone, Baker Street (or Notting Hill Gate if you choose West texture).
Stops (2–3, by name): Marylebone Village streets → Regent’s Park edge (short loop) → clean exit OR Notting Hill (tight loop) → one memorable stop → exit clean.
Cut rule: don’t turn this into shopping + “one more neighborhood.” One loop only.
Rain swap: if weather turns, keep the neighborhood part short and move indoors nearby.
Loop C (Rain-safe closure — indoor block + covered drift-free walk):
Closest stations: Holborn / Tottenham Court Road (British Museum area) OR Charing Cross (central indoor options).
Stops (2–3, by name): British Museum (tight cap) OR National Gallery (choose one) → short covered walk zone → clean exit.
Cut rule: set a hard time cap. Day 7 is not for “we can stay longer.”
Rain swap: this is already the swap—commit and keep movement simple.
Day 7 rule: if a choice has a queue risk, it is not a Day 7 choice—unless you are fully okay with missing it and leaving anyway.
13:00 – 14:00 | Lunch + pack your day down (this is how you leave calm)
This lunch is not about “the best place.” It’s about ending your week like a professional: fed, calm, and not rushed.
14:00 – 16:30 | Buffer block (so London can’t sabotage your exit)
This buffer is what separates a clean ending from a stressful one.
London doesn’t sabotage people with big disasters. It sabotages them with small friction: wrong station exits, unexpected platform changes, “near station” walks that aren’t near when you’re carrying bags, and last-minute uncertainty.
Day 7 cut rule: if you’re watching the clock, your itinerary is finished. Tighten the loop and move toward your exit calmly.

Day 7 is not for cross-city repairs. A short final loop plus buffer time is what makes a week in London end proud instead of panicked.
The Killer Mistakes Checklist (For a Full Week in London)
Mistake #1: Treating a 7-day trip like seven separate days.
A week is one system. If Day 2 is heavy, Day 3 must protect you. If Day 4 is queue-risk, Day 5 must reset you. The week must breathe.
Mistake #2: Paying for a weak base.
If you add 20 minutes of station-walk or awkward transfers twice daily, you don’t “save money.” You donate hours of your life to commuting. Fix your base first:
Where to Stay in London (2026): The Base That Makes London Feel Easy.
Mistake #3: Overbooking tickets until the week has no flexibility.
The best London weeks have 1–2 protected anchors and the rest is smart structure. If everything is timed, rain and queues turn your week into stress.
Mistake #4: Repairing a lost hour by adding distance.
This is the classic London spiral. You run late, then you add another far stop “to make up for it.” That makes everything worse. Tighten the radius. End calm.
Mistake #5: Ignoring transport logic.
If you don’t understand how London’s movement system works, you leak time daily. Keep this saved and read it once, properly:
How to Get Around London (2026): The System That Saves Your Day.
Mistake #6: Underestimating how the week changes your alertness.
By Day 4–7, tired tourists are less focused in crowded hubs. If you want the clean safety rules (scams + night movement + safe habits), keep this handy:
London Safety Guide 2026: Safe Areas, Common Scams & Night Travel Rules.
The TripsCity Funnels (Use These to Strengthen Your Plan)
If you want the big picture logic behind why London punishes vague planning, start here:
Complete Travel Guide to London 2026.
If you want costs and budgeting to stay honest (so you don’t leak money through friction), use:
London Budget Guide 2026 and
Is London Expensive for Tourists in 2026?.
If you want transport costs, caps, and the mistakes that inflate your week, use:
London Public Transport Costs Explained (2026).
The Direct Decision (No Soft Ending)
If this is your first London trip, you don’t need more places.
You need a plan that survives real life: queues, fatigue, weather, station exits, and the temptation to over-stack.
Follow this London 7 Days Itinerary with discipline. Keep the daily buffers. Use Day 6 as your repair day. Treat Day 7 as closure, not ambition. And if your base is weak, fix the base—because London will punish you for pretending it doesn’t matter.
Do that, and seven days won’t feel like a stretched checklist.
It will feel like a complete first visit done right.
FAQ: London 7 Days Itinerary (2026)
Is 7 days too much for London?
No—if you plan it as a system. Seven days is ideal when you mix icon days with neighborhood texture and include a flex day. It becomes “too much” only when you scatter across the city daily and turn the week into constant commuting.
Where should first-timers stay for a 7-day London itinerary?
The best base is one with a short station walk and direct or one-change routes to the core. Zone 1–2 is the safest logic, but a strong Zone 2 base can beat a “central” base that’s awkward to reach. Base quality decides your entire week.
How many “real attractions” per day is realistic for a full week?
For most travelers, 2–3 anchors is the maximum that still feels good: one main anchor, one secondary choice, and one optional bonus only if the day stays on time. More than that usually becomes a queue-and-transport day.
What should I prebook for a 7-day London trip?
Prebook only the stops that can destroy timing: one or two high-demand, queue-heavy anchors. Don’t overbook your week. Flexibility is what keeps a 7-day trip calm when weather and queues change the day.
Is 7 days enough for London plus one day trip?
Yes—if you keep it disciplined. A London one-week itinerary can easily handle one day trip when you treat it as “one destination, one schedule, one clean return.” The clean choice is placing it on Day 6 (your flex day) and choosing one destination like Windsor, Oxford, or Bath—then returning without trying to add extra London stops on the same day.
Should I add day trips during a 7-day London stay?
Yes—if disciplined. One destination, one schedule, one clean return. Don’t bolt a day trip onto a day that already has central London plans. The clean move is placing it on Day 6 (your flex day) so it can absorb reality.
What’s the biggest mistake people make on a 7-day London itinerary?
They confuse “more days” with “more freedom.” Then they scatter. London doesn’t punish effort. It punishes over-stacking and bad sequence—especially across a full week.